Sentinel简单入门
1、下载使用
下载sentinel地址:https://github.com/alibaba/Sentinel/releases
下载 sentinel-dashboard-x.x.x.jar
下载到本地以后,通过一下命令java -jar sentinel-dashboard-x.x.x.jar 进行启动
启动完成以后在浏览器访问localhost:8080进入登录页,默认用户名和密码都为sentinel
2、客户端集成Sentinel
在pom.xml中添加如下依赖
<parent>
    <groupId>org.springframework.boot</groupId>
    <artifactId>spring-boot-starter-parent</artifactId>
    <version>2.1.13.RELEASE</version>
</parent>

<dependencies>
    <dependency>
        <groupId>com.alibaba.cloud</groupId>
        <artifactId>spring-cloud-starter-alibaba-sentinel</artifactId>
    </dependency>
    <dependency>
        <groupId>org.springframework.boot</groupId>
        <artifactId>spring-boot-starter-web</artifactId>
    </dependency>
</dependencies>

<dependencyManagement>
    <dependencies>
        <dependency>
            <groupId>com.alibaba.cloud</groupId>
            <artifactId>spring-cloud-alibaba-dependencies</artifactId>
            <version>2.2.1.RELEASE</version>
            <type>pom</type>
            <scope>import</scope>
        </dependency>
    </dependencies>
</dependencyManagement>
在yml配置文件中添加如下配置
server:
  port: 8081

spring:
  application:
    name: sentinel-demo
  cloud:
    sentinel:
      transport:
        dashboard: 127.0.0.1:8080
        port: 8719
新增一个测试接口,如下:
@RestController
@RequestMapping("/sentinel")
public class IndexController {

    @GetMapping("/testA")
    public String testA(){
        return "testA";
    }
}
启动客户端,在浏览器中访问接口/sentinel/testA, 此处要先访问资源,否在在Sentinel面板中无法看到对应的客户端
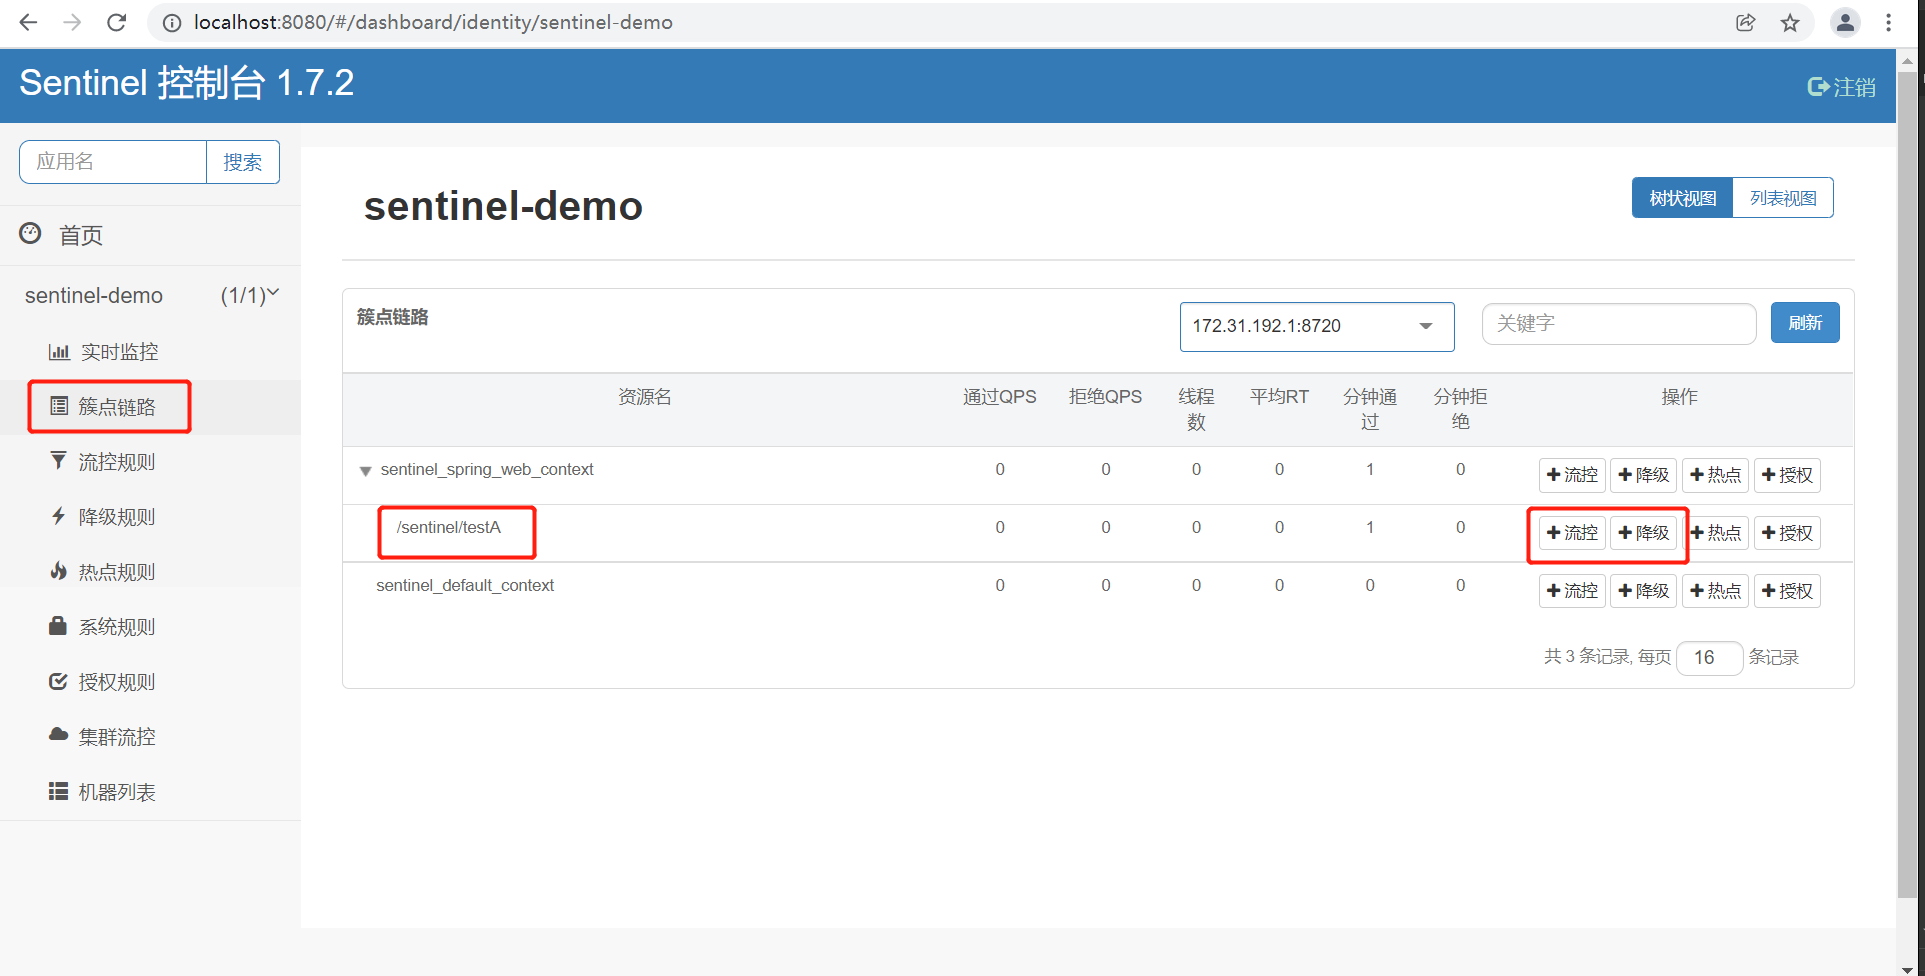
接下在我们登陆Sentinel客户端,会在Sentinel面板看到sentinel-demo服务,此时我们可以针对上面的接口配置限流信息和降级信息了,如下:

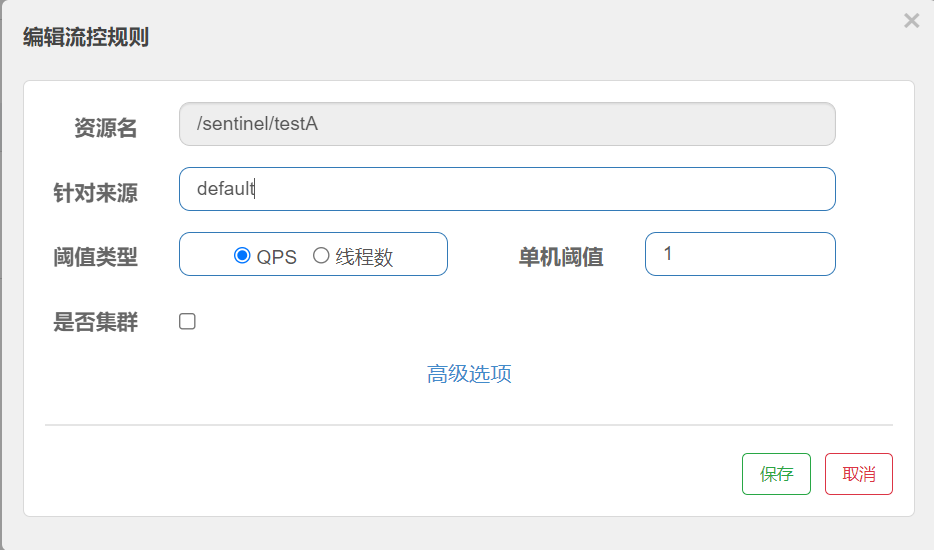
我们配置一个限流规则如下:

我们在浏览器快速访问http://localhost:8081/sentinel/testA, 会看到返回Blocked by Sentinel (flow limiting)信息,说明我们配置的限流规则生效了
标签: Sentinel SpringBoot 限流 熔断


